Configuring Qlik Cloud Connection
ConnectReport supports connections to Qlik tenants in the Qlik Cloud platform.
To get set up, refer to this guide. The steps outlined in this guide take about 30 minutes to complete.
Overview
This guide covers configuring a Qlik Cloud data connector in ConnectReport. You will configure a Qlik Cloud identity provider in order to create authenticated, signed requests from ConnectReport to your Qlik Cloud tenant, and complete a few other steps to create a secure connection to your Qlik tenant.
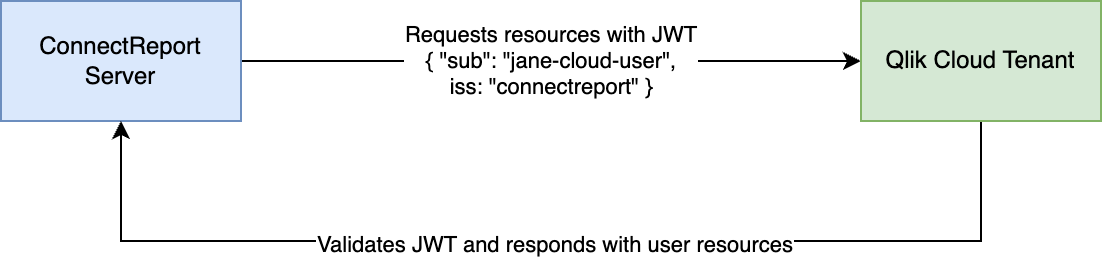
Upon successful configuration, ConnectReport will send authenticated requests to your Qlik Cloud tenant on behalf of its users. Each ConnectReport user is directly mapped to a corresponding Qlik Cloud user. When a report is executed by a ConnectReport user, their username is included in the authentication information sent to Qlik Cloud. Qlik Cloud then applies the appropriate section access rules and permissions to retrieve data specific to that user.
Steps
- Create RSA key pair
- Configure JWT IDP in Qlik Cloud
- Create web integration
- Set web integration ID and upload private key in ConnectReport
- Test the connection
Prerequisites
You will need the following to complete this guide:
- An OpenSSL distribution installed on your local system. You can validate whether OpenSSL is installed by running the program from your command line or bash:
openssl - A Qlik Cloud tenant
- A ConnectReport installation. Refer to the install guide here if you have not already
Create RSA key pair
You’ll need to generate an RSA key pair ConnectReport and Qlik Cloud to securely communicate and verify claims about user identities. You will use the RSA keys to configure your Qlik tenant’s JWT authentication in the following step.
Run the following OpenSSL command in your preferred command line to create a private key:
openssl genrsa -out privatekey.pem 4096
We recommend that you follow key management best practices and store your private key securely, as it will be capable of generating credentials.
ConnectReport will need the private key in PKCS #8 format. To convert the private key, run the following:
openssl pkey -in privatekey.pem -out privatekey-pkcs8.pem
Create a public key based on your private key. OpenSSL will prompt you for various information, but you only need to enter a Common Name. For the common name, choose something identifiable such as “connectreport-dev”.
openssl req -new -x509 -key privatekey.pem -out publickey.cer -days 365
Configure JWT identity provider in your Qlik Cloud tenant
In this step we will use the public key generated to tell your Qlik tenant how to verify credentials sent by ConnectReport, and complete the relevant fields for your Qlik Sense IDP configuration.
Navigate to the Management Console of your Qlik Cloud tenant and click Identity provider.
Click Create new
For Type select “JWT”
Carefully copy the contents of the public key you generated in step one. You should open the contents of your clipboard to validate there are no stray line breaks. Alternatively, if you are on bash, run cat publickey.cer | pbcopy to copy the contents. Paste the contents into the certificate field.
For Issuer, enter https://connectreport
For Key ID, enter cr_qlik_jwt
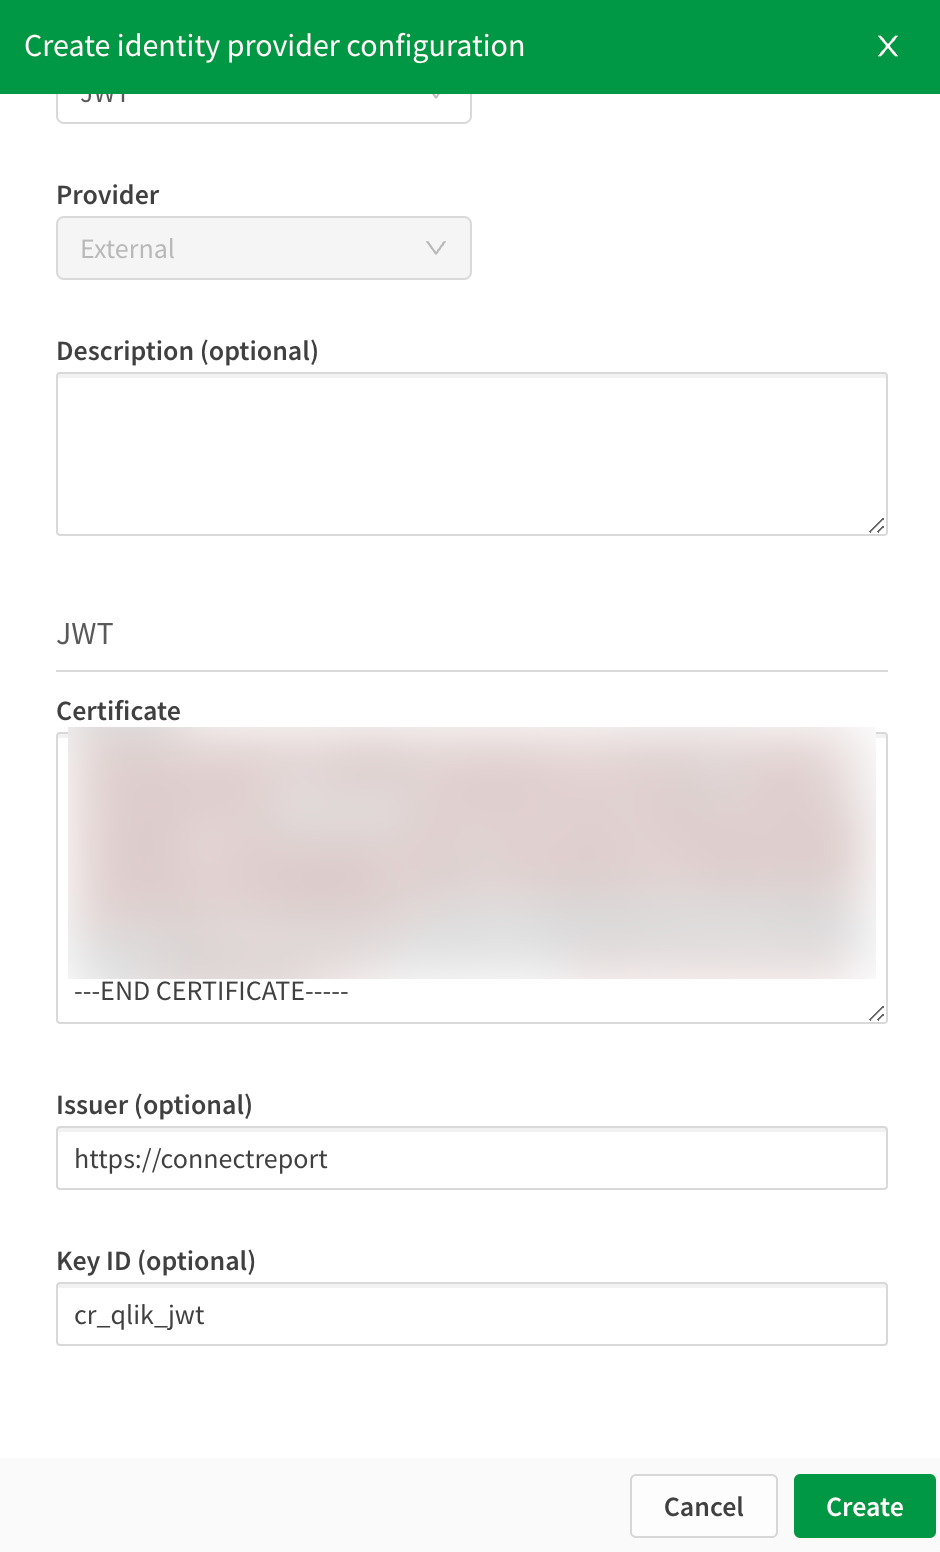
Click Create
Create web integration
A web integration is needed for ConnectReport to successfully make requests to your Qlik Cloud tenant.
From the Management Console of your Qlik Cloud tenant, under Integrations, click Web.
Click Create new
Enter a name such as “ConnectReport”
Add the origin https://localhost. ConnectReport will make requests from the localhost origin.
Click Create. Take note of the ID, you will need it in a subsequent step.
Set web integration ID and private key in ConnectReport
Navigate to the management console of your ConnectReport server.
Under Data Connectors, navigate to Qlik.
In Host URI, enter the URI of your Qlik Cloud tenant. It will look something like tenant.region.qlikcloud.com
Set Web integration ID to the ID of the web integration you created above.
Under IDP key, upload the PKCS #8 formatted private key you created above.
For API key expiry days, set it to a value that meets your needs. The ConnectReport repository will store API keys it creates for Qlik Cloud users, and their expiry will be determined by this value.
ConnectReport will generate API keys for users with the
subclaim based on either the user’s ConnectReport username or, if set, the user’s Qlik Sense username. Ideally, your usernames should map directly to Qlik Sense usernames so that you don’t have to configure anything additional. However, you may configure Qlik Sense usernames on a per-user basis from the Users section of the ConnectReport management console.
Test the connection
Navigate to the ConnectReport portal and create a template.
From the sidebar, choose Qlik Sense.
Validate that the app list loads and shows the apps you expect to see.
Your users should now be able to drag visualization and data into templates using data from your Qlik tenant.